


 There are tons of embossing techniques, I'm sure there are plenty I don't know about. There are a bunch of tools too, from the Cuttlebug to the "Embossing Heat Tool" (which is not what we call it in my scrapping group).
  To help others make heads or tails of embossing powder versus embossing plates, I'm doing an embossing series! Expect to see at least one post a week with a new embossing style (some use the same technique with a twist).
 First up is the basic heat emboss. This can be a lot of fun for first timers especially if you're using metalic embossing powder. For this technique you need a "heat tool" (seen in the far right of the first picture), embossing powder, paper, a stamp and versamark. (You can use regular ink, but versamark holds the powder better). It's better to use a stamp that has a large solid area.
 Once you've picked out your tools, stamp your image in the versamark... it won't dry too quickly, but you'll still want to be quick adding the powder. I make sure to have an extra sheet of paper (if I don't have an embossing tray handy) that I can "pour" the excess powder onto. Tap the back of your image to dislodge extra powder (and to get rid of the bits that end up outside your image). Then turn on your heat tool... give it a moment to warm up and then apply the heat to the powder. Don't get too close or you'll burn the powder or paper!
  For the record... a hair dryer does NOT work. You need lots of heat with very little airflow.
The heat "melts" the powder, it's more obvious with the metalic powders, keep your heat tool moving so you don't over do it.
This kind of embossing is great for making your own suedo embellishments. Stamp an image in one color, stamp it again on a scrap and emboss part of it, cut out the embossed part and popdot it down.
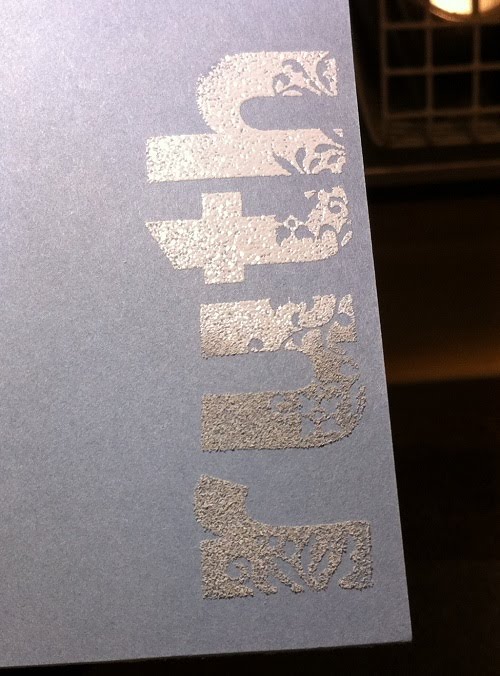 Here's an example of white embossing powder on colored cardstock, you can see how it goes from "what? that's WHITE?" to "oooh shiney white!"
4 comments:
wonderful tutorial Ruth!
What a great series and you gave a great tutorial. Embossing adds so much and I love how you did your name, beautiful.
Great tutorial!!! Thanks!!
Hi Ruth!! Hope you had a great holiday season and Happy 2011 to you! :) Great tutorial, I'm excited to see your whole series!
Post a Comment