Monday, January 10, 2011

Embossing, Day Two: Resist Embossing

Posted by Micah at 9:23 AM 4 comments
Welcome back! Today I'm going to go over an embossing technique that uses heat emboss from the previous post.


To start this project you need the usual suspects of paper, ink, and stamps. Look for a stamp that has lots of surface to it, not something that is nothing but itty bitty lines. For the embossing portion you'll need "detail clear" embossing powder, versamark pad and your heat tool. You'll also need a brayer, or a sponge, or some other means of covering large areas with ink.


Start off with a light color paper, I picked White Daisy because I'm making a card with the Wings paper pack. Stamp your image a couple times (I picked the butterfly and the word "Soar" from this month's Stamp of the Month, "Find Your Style") and cover in your powder. Tap off the excess and apply heat from your heat tool. Take the time to shine a bright light (or just hold it up to the light) on your paper to look for "dull" spots, that'll be spots that the heat tool didn't quite melt all the powder.

Next apply your ink. I'm not adept at using a brayer so mine came out a bit uneven, I typically use a sponge or even run the ink pad over the paper (careful with this one though, if the ink pad is fairly "juicey" it could oversoak your paper!). Edit to add: Because the embossed image is glossy it doesn't "hold" the ink... this is the "resist" part of the resist emboss!

Now I've got white butterflies on Sweet Leaf green paper!
Hint: you can use patterned paper to end up with patterned butterflies on a darker paper (in that case you'd have to use ink dark enough to hide the pattern).


But wait, there's more!! For three easy payments of... no, wait that's not right.


Let your paper dry completely, I mean REALLY dry... and stamp your image again in some of the larger "blank" areas. Apply your powder (this is why it has to be dry, or your powder will stick where you don't want it to) and heat and now brayer or sponge a darker color! I used Juniper, again to coordinate with the paper pack I'm using.


So how cool is that? You now have two sets of your image... white and green.
I did a third layer using black ink for the final bit. Experiment with it. Use your lighter colors first. See how the first butterfly seems to be "on top"?


Tip: if you find that the ink is staying on your image (such as when you sponge) just rub it gently with a very slightly damp tissue or a nearly dry baby wipe. That will take the ink off your embossed image without damaging your paper.


I've done this sort of resist emboss technique before. In that case I stamped a word in a dark ink and then stamped over it with the embossed image and sponged another color over that... leaving the word visible like through a window. My friend Colleen showed us that one, loved it!


Here's one more example of resist. This is a 6x6 layout I made for a consultant swap. The dress form on the left is detail clear, I used white daisy pigment ink to give that smokey look around it before adding a flower. (Sorry the sentiment can't be seen, poor lighting where I was taking pictures!)

Remember that your pigment based inks (like black and white) will stick to your previous layers a bit more, you'll need to clean off the embossed image before the ink dries too much.


Thanks for checking in, I hope you enjoyed today's embossing technique. Please, if there's a particular embossing technique you'd like to see, comment! I certainly don't claim to know about ALL of them and I'd love to learn about new techniques!

Wednesday, January 5, 2011

Embossing, Day One: Heat Emboss Basics

Posted by Micah at 9:49 AM 4 comments
There are tons of embossing techniques, I'm sure there are plenty I don't know about. There are a bunch of tools too, from the Cuttlebug to the "Embossing Heat Tool" (which is not what we call it in my scrapping group).


To help others make heads or tails of embossing powder versus embossing plates, I'm doing an embossing series! Expect to see at least one post a week with a new embossing style (some use the same technique with a twist).

First up is the basic heat emboss. This can be a lot of fun for first timers especially if you're using metalic embossing powder. For this technique you need a "heat tool" (seen in the far right of the first picture), embossing powder, paper, a stamp and versamark. (You can use regular ink, but versamark holds the powder better). It's better to use a stamp that has a large solid area.


Once you've picked out your tools, stamp your image in the versamark... it won't dry too quickly, but you'll still want to be quick adding the powder. I make sure to have an extra sheet of paper (if I don't have an embossing tray handy) that I can "pour" the excess powder onto. Tap the back of your image to dislodge extra powder (and to get rid of the bits that end up outside your image). Then turn on your heat tool... give it a moment to warm up and then apply the heat to the powder. Don't get too close or you'll burn the powder or paper!

For the record... a hair dryer does NOT work. You need lots of heat with very little airflow.

The heat "melts" the powder, it's more obvious with the metalic powders, keep your heat tool moving so you don't over do it.

This kind of embossing is great for making your own suedo embellishments. Stamp an image in one color, stamp it again on a scrap and emboss part of it, cut out the embossed part and popdot it down.
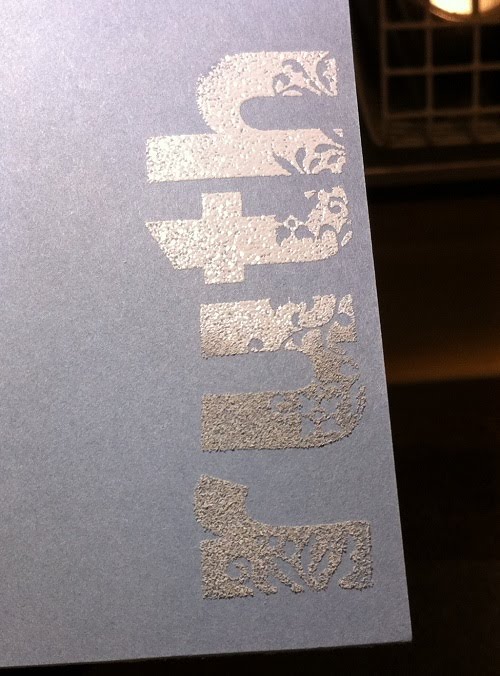
Here's an example of white embossing powder on colored cardstock, you can see how it goes from "what? that's WHITE?" to "oooh shiney white!"

Thursday, December 30, 2010

Another item to cross off The List

Posted by Micah at 8:54 AM 3 comments
I hope everyone had a great holiday. The kids got little pre-schooler friendly handheld games for Christmas so I got my iphone back... that was present enough hehe.

Aside from visiting with family in from out of town I'm waiting, with nearly held breath, for the new CTMH 2011 catalogues to arrives. I've SEEN it, it's amazing! There isn't a single new paper pack that I won't be ordering for my own use, never mind for my monthly group. Super excited!

While not officially back to crafting, I do have something craftish related that's been on my List (you know, that monster list that never seems to get smaller of stuff To Do) for ages, so I'm posting some pictures! Six years ago we bough a set of table and 8 chairs from IKEA that had white canvas seats... well that won't do! I recovered them nearly immediately with a nice yellow and blue pattern that suited the house we were in at the time. This was before I had kids...

Now the chairs, all but the two that aren't around the table, all look horrid! Covered in stains from chocolate milk to raspberry jam to goodness only knows what else (remember, my kids are all under the age of four!) The pattern is wearing thin in places and, even though I've scrubbed the seats with upholstery cleaner, the stains remain.


I was determined to get them recovered... and to purchase heavy weight clear vinyl to top them off with! I've done half the chairs now and I'm really happy with the results.

Aside from the pictures I have some tips for anyone else doing this kind of simple recovering job:


  1. Fabricland often has 50% off sales on their upholstery fabric. But remember, if covering in Vinyl too, you don't "need" upholstery fabric... you can use anything that doesn't stretch.
  2. If you have little kids that fight over where to sit... get some nice fabric for them too! I did one for each kid even though the smallest isn't sitting in a chair yet. (I used "licensed" cotton.)
  3. If you are recovering with kids in mind, do it in layers... your fabric, their fabirc, then the vinyl. This way if the kids get tired of the pattern you picked, it's easy to take off the vinyl then their fabric and redo the vinyl... leaving you with a matching chair!
  4. When stapling, do one layer at a time or your layers will get bunched.
  5. Also remember to start in the middle on any side and work toward the edges.
  6. Triple check that your pattern is the right direction.
  7. Check for a 4th time that your pattern is the right direction.
  8. When working with straight lines (lines or squares or other linear style pattern) don't pull too tightly "across" the pattern... in my case I pulled tight front to back but was careful left to right.
  9. Put in a favorite movie for the kids and wait until they are engrossed or they'll hear the staple gun and try and help you cut fabric.
  10. Speaking of cutting fabric, use kitchen scissors on your vinyl, but use your nice fabric scissors for the fabric.
  11. Don't fret about straight cuts on your fabric! You're recovering chairs, not making a wedding gown!! (My sewing friends would have been horrified watching me cut this fabric).
  12. Cut away fabric from the screw housing on the seat so you aren't fighting with reattaching it to the chair.
  13. Trim the vinyl ruthlessly on the corners or your seat won't go back on the chair frame. No seriously.
  14. While the seat is off the frame, go ahead and wash the frame!
  15. Have tums... or a good stiff drink... ready.
  16. Don't try and do it all in one day.

Here are the seats all finished. I love the fairies, which are obviously Tinkerbelle and friends but in a style I've never seen before! Kerowyn keeps changing her mind on whether she likes Minnie or Tinkerbelle better, thankfully Elora doesn't care yet since she's still in a high chair.

Thanks for checking in! I'll be back soon with my embossing series. Please feel free to suggest different types of embossing, I'm sure I've missed a few!

Monday, December 20, 2010

Book distressing

Posted by Micah at 10:49 AM 7 comments
I have a lot of friends that read fantasy or play fantasy role playing games. I love stories like the Hobbit and movies from books like Lord of the Rings. I play World of Warcraft with my husband, mother and best friend. So when I saw this book at Costco the other day, I had to pick it up! It's technically a photo album but I just couldn't see it that way (scrap bookers don't usually keep photos that way afterall).

Instead I could see an old tome, perhaps an alchemist kept her potion recipes in it, maybe an archeologist found it and discovered a guide to ancient dragons.


It also reminded me that I had been looking for this style of photo album to put my recipe cards into. This way you can write out your recipe, easily "re"sort them if you get another recipe and you're storing them alphabetically, and if you spill something on the card? no problem! Just make a new card!


But the book looked so new! It's bonded leather so it has that matte look to it and I have to be careful distressing it. I took a deep breath and dived in with my sanding block. Every now and then I wiped it down with a damp cloth to get rid of the dust. Then I "oiled" it by gently rubbing it with a cloth with a teensy bit of oil on it


I was going to do more but the finish was coming off a bit too easily on the embossed design and the spine, so I topped it off with some mocha pearls and called it a finished project.


I don't expect to get too many posts made between now and the new year... but in the new year I'm going to do a series on different styles of embossing. What kinds of embossing techniques have you heard of? Which is your favorite? Is there one you just can't figure out? or just can't stand doing?

Thanks for checking in!

Wednesday, December 15, 2010

When Kids Go Wild

Posted by Micah at 3:57 PM 8 comments
Oh boy, my kids love to craft. We have designated crafting times and work with paint, paper, pens, pencils, crayons, sparkles... you name it! Every now and then, though, they'll get into my crafting stuff unsupervised (I can't be in two places at once!). Anything dangerous is out of reach (well I guess just about anything is a choking hazard... but I mean chemicals and stabbity things) but the markers... my markers are in reach. There is video evidence (at the end of this post) of what happens when a nearly-four-year-old decides he wants to disguise himself and mommy is feeding the baby in the other room.


In the meantime, I have more sneak peeks of Wings. This time I'm using the stamp set A Game and a flower from Rosy Regards. Both these stamp sets, and the paper, will be available January 1st. Very excited (have I mentioned I'm excited??)

And now for that video evidence!


Monday, December 13, 2010

Christmas Card!

Posted by Micah at 10:55 PM 13 comments
More Christmas stuff?? Don't worry, we'll be starting in on Valentine's Day soon!

I fell in love with that broad ribbon a month or so back and purchased it figuring I'd add a nice big bow to my door wreath... but what do I do with the rest of it? Cut it down, pull out the wire and make a CARD out of it, of course!

Edit: As suggested I entered this (for the second time ever in my life of crafting) in a challenge over at Hand Stamped Sentiments! The irony here is that I didn't actually use any stamps! No ink even!

I used a chipboard snowflake and pre-stickied blue pearls from Close to My Heart, a Martha Stewart snowflake edge punch and then cardstock and shimmer spritz from Stampin' Up.

We're using our 12 Days of Christmas calendar with the kids... I put their evening vitamins in it (which are like gummie bears anyway). The only issue is that my 2 year old wants to pick the number SHE wants, not the sequential number. That and keeping it somewhere they can see it without being able to touch it. That many vitamins won't do them any harm, but it'll certainly make them feel uncomfortable!

Sunday, December 12, 2010

Wings and Plenty for Twenty

Posted by Micah at 6:37 PM 6 comments
I am... in love with the new "Wings" collection from Close to My Heart. It's not available to the public just yet, but today I got to play with the paper and stamps and put together a couple of projects.

See that nifty ribbon? it COMES that way, already pleated!!

The bird is from the January Stamp of the Month and the sentiment is from Dreams, also released in January.

It may be hard to tell but the colors are Juniper, Sweet Leaf, Vineyard Berry and black... I also used a bit of Garnet ink on the front of the bird.

I also got an order today! Aside from the approximately $20 worth of items I ordered, I also got "Miracle" (D1140) for the Plenty for Twenty free stamp deal this month! I love that it's a surprise which retired stamp you're going to get... I've got another parcel which should arrive tomorrow!

If you'd like to get your own free stamp set ($26.95 Cnd value) just place an order through MyCTMH site of $20 (before tax and shipping)... during the check out you'll see an item added to your list titled, "Plenty for Twenty".

Edit: I changed the top picture to one taken in better light.

Friday, December 10, 2010

AAAAAH!

Posted by Micah at 8:14 AM 1 comments
*flail* my parcel with the new (new in January) "Wings" product from Close to My Heart is ON THE WAY TO MY HOUSE RIGHT NOW!! I'm so excited. This stuff is so amazing. SNEAK PEEK!!

There are tons of new stamp sets, a gorgeous paper pack (level 1 and 2)... some amazing new accessories. Look at the "joy" stamped in the picture, that's the new alphabet stamp set.

I can't even sell this stuff yet!! I'm not going to get anything done for the next week I'll be too busy playing with the new stuff.

At least I'll have new projects to post in my blog again! Thank you all for your patience during my time of technological crisis.

And now... for the winner of my draw, a brand new copy of Dr. Linda Bacon's "Health at Every Size: The Surprising Truth About Your Weight".

Our friends at Random.org provided me with a random number based on the number of comments... starting at the top and working my way down we come up with Erin who said:

"WAAAAAAAAAAAAAAAAAAAAAANT.
Hey, I already follow you here AND on Facebook, though, does this count as two entries, or do I need to comment again to be like HEY I ALREADY FOLLOW YOU"


Congratulations Erin! Send me an email with your shipping address and I'll get that ordered right away!

Wednesday, December 8, 2010

Woo! Computer is back!

Posted by Micah at 2:26 PM 2 comments
Thank you for your patience and computer-condolences! My computer is back and (mostly) better.

I wanted to pop in and update about the computer but also remind everyone that this is the last day to enter my draw! Enter! Enter often! Tomorrow my kids will be drawing a random name.

Friday, December 3, 2010

Still here!

Posted by Micah at 12:37 PM 3 comments
WOW has this week been eventful! My computer is now at the computer doctor. I'm using a laptop but don't have all my archived emails in Outlook (lesson learned!). We're putting up the Christmas Tree on saturday, PHOTO OP! Which could be a good thing since I bought a new SD card for my aging camera, hopefully that will fix the problem I've been having (if not fix the data recovery issue).

At any rate, this month is pretty exciting in Close to My Heart land. If you spend $20 through my CTMH site you will get a surprise FREE stamp set (D size, so a $26.95 value if you're Canadian) and you won't pay shipping on the free stamp! (Americans can order here.) I can neither confirm nor deny that I may or may not have placed two qualifying orders through my own site (instead of through the consultant order entry) to be surprised myself.

Projects are piling up as I wait for my electronic baby to come home from the shop, but hopefully I'll have some kid-free craft time really soon!

Thanks for checking in!
 

Stamp Off, Eh! Copyright © 2011 Design by Ipietoon Blogger Template | web hosting